Friday, December 4, 2015

Green Bean Casserole

This is a delicious spin on the classic green bean casserole that is so popular around the holidays.

Green Bean Casserole

-1 C mushroom soup (I use THIS recipe if using from a can, use 1/2 C soup + 1/2 C milk)
-4 oz Cream Cheese
-1 C sour cream
-1 C grated cheddar cheese
-Salt and Pepper to taste
-cooked bacon, broken into pieces (amount depends on personal preference)
-1 can French's Crispy Fried Onions

-4 C green beans, cooked (fresh, frozen, or canned)

-Mix the soup, cream cheese and sour cream until smooth. Add in about half of the cheese, bacon and 1/2 C of the fried onions and mix.
-fold in the green beans, evening coating
-dish out into a casserole pan and top with remaining cheese, bacon and fried onions.

Bake at 350 for 30-40 minutes


Monday, November 30, 2015

Chocolate Pie

This pie was an experiment for Thanksgiving. I have never liked the idea of chocolate pie being just a box of cooked chocolate pudding poured into a pie crust. It just doesn't sound appealing to me at all. So when my husband requested a chocolate pie for Thanksgiving dessert, I decided to try using chocolate custard instead. It turned out AMAZING. If you are a fan of chocolate pie, this recipe is a must! It has 3 layers of chocolate, and it is silky smooth and divine!

Chocolate Pie

-3/4 C whole milk
-3/4 C  heavy cream
-3 Tbsp corn starch
-4 egg yolks
-2 tsp vanilla
-2 C milk chocolate chocolate chips
-1/4 C heavy cream
-Cooked pie shell (AMAZING recipe for pie dough found HERE)


-whisk egg yolks together with vanilla in a bowl and set aside.
-in a microwave safe bowl, melt the chocolate chips and add the 1/4 C of heavy cream and mix until smooth. Set aside.
--in a saucepan, combine milk, cream, and corn starch, whisking until smooth.
-over medium heat, stir constantly with a whisk until the mixture thickens. Cook 3-5 minutes stirring constantly until the starch has cooked. (take a taste if you are unsure if the mixture isn't thoroughly cooked)
-remove from heat and add a little of the milk/cornstarch mixture to the egg yolks and whisk. Add a little more and whisk again. Keep whisking in the thickened mixture to the eggs a little at a time until it has all been mixed together.
-Return everything to the saucepan and cook over medium heat for about 2-3 minutes, do not let the mixture boil.
-Remove from heat and whisk in the chocolate/cream mixture. Mix until smooth.
-Pour into pie shell and let set until it cools.

-1/2 C milk chocolate chocolate chips
-1/2 C heavy cream


-Melt chocolate with cream and then spread about HALF of the ganache over top of the pie.

-1/2 C heavy whipping cream
-1 tsp vanilla
-1 tbsp sugar
-remaining ganache


-Whisk cream with vanilla and sugar in a mixer on high until whipped cream forms soft peaks. Add ganache and mix thoroughly until combined.
-Spread or pipe over the ganache layer of the pie.

-optional, drizzle melted chocolate over whipped cream layer.

refrigerate 1-2 hours 


Sunday, November 22, 2015

Back to Blogging

It's been a few months since I've regularly blogged. Autumn is a busy time at our house, playing outside in the awesome weather, making stuff to fill the freezer, and we were also able spent a few weeks in Canada, so it's just been a bit too busy for me to blog lately. I've been catching up and recently posted a few recipes today, and hope to spit out one or two great recipes a week for everyone to try and enjoy. We'll see how I do with the holidays approaching...so don't hold me to it too tight! I'll do the best I can. In the meantime, feel free to try a new recipe! And if you have any recipes that you enjoy and would love to share on my blog, email me at cakesncandies13@gmail.com so we can share the greatness that comes of cooking and baking with everyone!

Award Winning Apple Pie

So I decided that this year I would enter my tasty apple pie into my county fairs' Best Apple Pie contest. The only problem: the apples that I use for my apple pie were not quite in season yet. No problem! I had made about 8 apple pies last fall and froze them all, to be able to pull out over the year whenever I felt like I needed a fresh apple pie. So with my very last pie from last year (that had been a little squished from something in the freezer) I entered it into the fair, laughing at myself and thinking that there was no way that funny looking thing was going to win anything. Well, I was more than surprised when I looked at the case displaying apple pies to find that my year old, somewhat smashed down apple pie had won 2nd place over all! WOW! If only I had made it fresh, imagine the possibilities! Either way, the point of my story is that this pie is absolutely delicious, will beat out any pie made with canned pie filling, is super easy to make, and freezes extraordinarily well.

BEST Apple Pie EVER

-6 to 8 medium MACINTOSH apples (the kind of apples is EXTREMELY important)
-1/2 C white sugar
-1/4 C flour
-1 Tbsp cinnamon (more or less depending on your personal preference)
-Pie dough, enough for a bottom and top of an 9 in pie pan. (Best recipe found HERE)


-Peel, core and thinly slice the apples. (Thin and uniformly sliced apples will cook through and will soften better than larger pieces)
-Mix together the flour, sugar and cinnamon.
-Mix the flour mixture with the apples until it is evenly coated. Okay, so here is the tricky part, I always make a huge batch of this stuff and haven't a clue how much I actually use on each pie because I usually do it by taste, as the juiciness and sweetness varies from apple to apple. So start with just a little bit of the flour mixture and keep adding it until it tastes good to you.
-Spoon the apple mixture into a pie pan lined with pie dough. (If you like a thicker pie crust, it is better to have the thicker crust on top, and a thinner crust on the bottom, because bottom crusts tend to get soggy.)
-dip your finger or a pastry brush into a little bowl of milk and gently spread the milk over the edge of the pie pan.
-Roll out the pie dough and place it over the top of the pie, fluting the edges together. Using your pastry brush, gently brush milk over the top of the pie crust and sprinkle a little white sugar over the whole pie.
-Cut 3 to 4 slits into the top of the pie to help release steam while the pie cooks.

Bake at 375 degrees for 30-40 minutes or until the pie turns golden. 


Pie Crust 2

Pie Crust 1 is my favorite pie dough recipe ever, but this is my go-to crust if I want an instant pie crust. Although it turns out better if chilled for awhile, it still will work if used right away. I usually use this recipe when making pot pie. Another recipe for pie dough that I will highly recommend would be the one on the Tenderflake pure lard box which I'm sure you can find somewhere at tenderflake.ca  or HERE.

 Makes 1 9inch pie crust

Pie Crust

-1 1/4 C flour
-1/4 tsp salt
-1/4 tsp baking powder
-1/4 C lard (or shortening)
-1/4 C cold butter
-1/4 C ice water

-Sift flour, salt and baking powder together in a bowl
-cut in the lard (or shortening) and butter with a pastry cutter until the fat is roughly pea size
-add the cold water and gently mix, kneading only a handful of times until a dough is form.
-chill until ready to use. 

-gently flour a surface and roll out the dough, flipping and flouring occasionally, so the dough doesn't  stick.
-fold in half or wrap around the rolling pin to pick up the dough without tearing and place it in a pie pan.
-try not to stretch the dough.
-if making just one layer of crust, use a fork and prick holes throughout the crust so air pockets don't form. You can also flute the edges or just use a fork to make it look pretty.

-chill the crust fore 15-20 minutes before baking (to lessen shrinkage)
-Bake crust at 375 degrees for 15-20 minutes or until golden brown. 


Pie Crust 1

This is the best pie crust I've ever had the privilege of making. This recipe comes from my Grandma, so I don't claim it as my own invention, but I must brag that this recipe has helped me create an award winning pie at my local county fair.
It's super flaky, tasty, and I have found it easier to work with than the other pie dough recipes I have previously worked with in my baking class. This recipe can make about 3 double layered pies (depending on crust thickness). This dough is also great to freeze into individual balls to pull out whenever the mood strikes you to make a pie.


Award winning Pie Crust

-1 lb Lard (preferably Tenderflake)
-1 C boiling water
-1 tsp salt
-4 heaping C flour
-1 tsp baking powder

-Melt the lard in the boiling water, stirring until completely melted. Stir in the salt until dissolved.


-GENTLY mix in the heaping cups of flour and baking powder, stir ONLY until the flour is wet and the dough looks marbled. DO NOT OVER MIX.


-cover and chill for 2-4 hours, or overnight.
-cut out a piece of dough roughly the size of a softball and form into a ball
-on a floured surface roll out the ball of dough to your desired size and thickness, occasionally flipping, turning and re-flouring the dough so it doesn't stick to the surface. Make sure you don't work the dough too much or your crust will be tough.
-Gently place the dough in your pie pan. Prick holes with a fork in the bottom of the shell if baking the shell without filling, otherwise, fill the shell with filling and top with another layer of pie crust and flute the edges to seal the crust together and make it look pretty.

Bake time will depend on type of pie. If just baking the shell, bake at 375 degrees for 10-15 minutes or until it starts to golden.


Pumpkin Waffles

It's fall and I have an over abundance of fresh pumpkin puree that I made and froze earlier this fall. We've had pumpkin pie, pumpkin cheesecake, pumpkin pancakes, pumpkin muffins and so I figured pumpkin waffles had to be next. These are great for a crisp fall morning...or afternoon or dinner. We are not above eating breakfast for supper at our house!

Pumpkin Waffles

-1 1/2 C flour
-2 tsp baking powder
-1/8 tsp salt
-1/8 tsp ground ginger
-1/8 tsp ground cloves
-1/2 tsp nutmeg
-1/2 tsp cinnamon
-1/3 C sugar
-3/4 C buttermilk
-1/2 C melted butter
-1 tsp vanilla
-3 eggs, separated
-1 C pumpkin puree


-Beat egg whites until stiff peaks form
-Meanwhile, mix all the other ingredients together until smooth. (feel free to adjust the measurements of the spices to your own personal preference) Fold in the egg whites.
-Follow the instructions on your waffle iron for cooking the waffles. 

Top with maple syrup and whipped cream. Enjoy!


Whipped Cream

-1 C heavy whipping cream
-1/4 C sugar 
(add more or less depending on how sweet you like your whipped cream)
-2 tsp vanilla

-whip on high until thick and fluffy


Thursday, November 19, 2015

Nanaimo Bar Cupcakes

These cupcakes are perfect if you want to take a break from your normal everyday cupcake. (...if you were to eat cupcakes everyday that is...) They bring in the flavors and textures of the delectable and loved Nanaimo Bar, but are in cupcake form. In short, if you are a fan of Nanaimo Bars, you are going to LOVE these cupcakes!

Nanaimo Bar Cupcakes

Cake:
-1 C boiling water
-1 C cocoa
-1 1/2 C buttermilk

-1 C butter, room temperature
-2 C sugar
-1 tsp vanilla
-1 tsp salt
-2 eggs
-3 C flour
-1 tsp baking soda
-1 tsp baking powder
-1 1/2 C flaked coconut
-1 C chopped or slivered almonds
 

-Add the cocoa to the boiling water and thoroughly mix until smooth, let cool and add buttermilk, mixing again until smooth. Set aside.
-In a mixer (or bowl with a handheld mixer), combine butter, sugar, vanilla and salt. Mix on medium speed until the batter is light in color and fluffy in texture.
-Add eggs, one at a time, combining completely each time.
-Sift together flour, soda and powder.
-Starting with the flour mixture, add a small amount to the cake batter and mix JUST until combined. Add a small amount of the cocoa/buttermilk mixture. Stir until combined. Keep adding flour and moisture alternatively, mixing just until combined until everything is incorporated. DO NOT OVER MIX.
-Gently fold in coconut and almonds.
-Spoon the batter out into individual cupcake liners

Bake at 350 Degrees for about 20 minutes, or until a toothpick inserted into the center of the cupcake comes out clean. 

Icing:
-1/2 C milk
-1/2 C cream
-2 tsp vanilla
-4 egg yolks
-2 tsp corn starch
 -1/4 C butter
-2 t0 6 C icing sugar

-in a heatproof bowl whisk together the egg yolks, corn starch and vanilla
-in a saucepan, combine the milk and cream and heat over medium, stirring constantly until the milk/cream mixture is hot, almost boiling, but do not allow boil.
-temper the eggs by pouring a little of the hot milk mixture into the egg mixture while whisking constantly. After the first little bit has been whisked in, slowly add the rest of the milk mixture in a slow stream while whisking constantly.
-return the mixture to the saucepan and cook, stirring constantly over low heat until the mixture thickens and coats the back of a spoon. (If you cook the mixture too long, or allow it to boil, it could curdle, and you don't want that!)
-allow to cool to room temperature
-in a mixing bowl cream together the custard, butter and icing sugar. (start with about 2 c of the icing sugar and add more if needed to make it thick enough to spread over cupcakes)
-Spread or pipe the icing mixture on top of cooled cupcakes.

-OR- 

Click HERE for easier, traditional Nanaimo Bar filling recipe 

Topping:
-1/2 C semisweet chocolate chips
-1/4 C heavy whipping cream


-In a microwave safe bowl, melt the chocolate chips and cream together and mix until smooth.
-spoon the mixture into a pastry bag or sandwich bag and drizzle over the cupcakes. 


Sunday, October 4, 2015

Pumpkin Pancakes

Fall is my favorite season, and a big reason for this is the food. I LOVE pumpkin! Pumpkin pie, pumpkin muffins, (recipe HERE) and pumpkin pancakes! This recipe is essentially a modified version of my traditional pancakes, but it has the perfect autumn twist to it!

Pumpkin Pancakes

-1 1/2 C flour
-1/4 C sugar
-1/4 tsp salt
-1/2 tsp baking soda
-1 tsp baking powder
-pinch of ginger
-pinch of cloves
-1/4 tsp nutmeg
-1/2 tsp cinnamon
-2 tsp vanilla
-1 egg
-3/4 C buttermilk
-2 Tbsp melted butter
-1 C pumpkin puree


-Mix the dry in ingredients together in a bowl and form a well.
-pour the wet ingredients into the well and mix until smooth
-Mix everything together until smooth. Drop desired amount of batter onto a greased, medium heated griddle or pan.
-Flip when there are air bubbles on top and the bottoms are golden brown


-Feel free to add less or more spices according to your personal preference. Also, If the batter is too thin for your personal preference, add less buttermilk. If the batter is too thick for your liking, add more buttermilk. 

Top your pancakes with maple syrup and whipped cream.

Easy Whipped Cream

-1 C heavy whipping cream
-1/4 C sugar
(add more or less depending on how sweet you like your whipped cream)
-2 tsp vanilla

-mix on high until thick and fluffy


Friday, August 21, 2015

Italian Potato Soup

AKA Zuppa Toscana
This soup is like the kind you'd get from the Olive Garden, but in my personal opinion, it's WAY better. We prefer chunky soup in our house, meaning more of the good stuff, (like bacon!) less of the liquid.
So here is a random story that kind of ties into this soup: growing up, and especially after reading The Jungle by Upton Sinclair, I wasn't a huge fan of sausage. I thought it was gross. Fast forward a bunch of years and I got engaged to a "meat conoscere" who had just bought half a pig right before we got married and made about 25 lbs of sausage himself. I told him that he would be eating all that meat himself, because I hated sausage. ...until I tried it. It was delicious! For the first time in my life I was loving pork (except for bacon, I had always been a fan of bacon!) Life was great...until the meat was gone. Back to the store bought stuff? No thank you. Well, since my husband is into animal production he has toured quite a few processing plants, and so we found a brand of meat that we could not only trust, but it tastes the closest to homemade sausage. So if you are wondering what is a good brand of sausage to buy, (at least in the North West part of the country) I highly recommend Falls Brand.

Italian Potato Soup, or Zuppa Toscana. or Wow this soup is delicious!

-1 lb Plain Sausage + 1 Tbsp italian seasoning + 1 tsp garlic powder + 1 tsp onion powder
-1 lb Bacon
-2 Medium onions, diced
-1 1/2 Tbsp finely minced garlic
-32 oz chicken broth
-1 Tbsp italian seasoning
-6 to 8 medium red potatoes, peeled and diced
-1 to 1 1/2 C cream
-1 bunch of kale, washed and chopped
-salt and pepper, to taste

-mix together the sausage with the seasonings and brown in a saucepan. (you could always just use Italian Sausage, but this method is preferred by my taste testers, aka the husband and kids)
-Cook the bacon in a skillet until crispy, roughly chop into pieces when it has cooled sufficiently. (Last time I made this soup I used Hickory Smoked bacon and it was fantastic, but then again, I do LOVE smoky flavors)
-After the sausage has browned drain of the extra fat and pat the sausage with a paper towel to soak up extra grease, do the same with the bacon. 
-in a large soup pot, saute your onions, garlic and italian seasoning.
-Add your chicken broth and the meat.
-Over medium heat, add your potatoes and cream and simmer until the potatoes have softened a bit.
-add the chopped kale and continue to simmer until the kale is softened and the potatoes are cooked through
-add salt and pepper to your personal taste.
-This soup tastes delicious with fresh baked bread sticks and if you have some fresh Parmesan around, it tastes amazing sprinkled on top.


Nanaimo Bar Ice Cream

This is actually a frozen custard that is packed with the flavors of the beloved Nanaimo Bar. If you are a fan of Nanaimo Bars, you are going to love this ice cream!

Nanaimo bar Ice Cream

Ice Cream:

-2 C whole milk
-8 egg yolks
-1 C sugar
-2 tsp vanilla
-1 C powdered milk
-2 C cream

Mix Ins:


Cookie Base:
-
1/4 C Butter                                 
-1/4 C Sugar                                 
-3 Tbsp Cocoa                                 
-1 Egg, slightly beaten                  
-1 C Graham Cracker Crumbs
-1/2 C Coconut
-1/2 C Chopped Almonds (opt)

Chocolate topping:
-1 C dark or semi sweet chocolate chips

-stirring constantly in a saucepan over medium heat, warm the milk until it is hot, but not boiling.
-in a bowl whisk the egg yolks, sugar and vanilla together.
-temper the eggs by SLOWLY pouring the hot milk into the egg mixture in a slow stream while constantly whisking the eggs. When all the milk has been added and thoroughly mixed, return the mixture to the saucepan and continue to simmer  and stir constantly for 5 to 10 minutes over low heat.
-let the mixture cool.
-in a different bowl, mix the powdered milk in with 1 1/2 cups of the cream and strain out the lumps.
-mix everything together and chill in the refrigerator for a few hour, or overnight.
-mix ice cream according to your ice cream makers instructions, or
-place in a kitchen aid and beat on high for a few minutes, until the mixture is light and fluffy, then place the bowl in the freezer.
-take the bowl out of the freezer every 20-30 minutes and beat on high until smooth.
-do this until a soft serve ice cream is formed.
-evenly mix in the cookie and chocolate.
-enjoy immediately as a soft serve ice cream or put into a freezer safe bowl and chill until ice cream hardens. 


Mix ins:
Cookie base:
-in a saucepan over medium heat, melt the butter with the sugar and cocoa until the sugar is dissolved. 
-add the egg and cook until the mixture has thickened slightly
-mix in the graham crackers, coconut and almonds and  press onto a cookie sheet and refrigerate.
-after the cookie layer has cooled, cut into bit sized pieces.


Chocolate layer:
-in a microwave safe bowl, melt the chocolate, stirring on 30 second intervals, until smooth.
-on a waxed piece of paper, spread out the chocolate so that it forms a thin layer.
-chill.
-once chocolate has hardened, cut or break it into bite sized pieces.


Monday, July 27, 2015

Cooking with Kids: Banana Peanut Butter Cupcakes

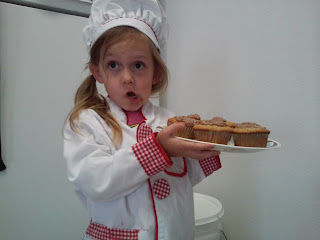
My kids LOVE to help me bake and cook. My 4 year old kept begging for me to let her make up her own recipe. So with some help, this is what she came up with. They were pretty darn good! The frosting we originally had was a chocolate custard mousse, which was AMAZING, but I found the flavors didn't really compliment each other well in the cupcake. So instead of providing that recipe here, I am providing a chocolate icing recipe that fits these cupcakes perfectly.

Banana Peanut Butter Cupcakes

-1/2 C butter, softened
-3/4 C sugar
-1/4 tsp salt
-1 tsp vanilla
-1/2 C Peanut Butter
-2 eggs
-2 tbsp buttermilk
-1 1/2 C flour
-1 1/2 tsp baking powder
-1 C mashed bananas


-cream together butter, sugar, peanut butter, salt, and vanilla until light and fluffy
-add eggs, one at a time, fully incorporating each egg
-sift together the flour and baking powder
-starting with the flour mixture, add a small portion of it to the cake mixture and gently mix in, stirring only until just incorporated
-add the buttermilk and mix again
-add more flour, mix and then a portion of the bananas, mix
-keep adding flour and bananas alternatively until everything in mixed in.
-try not to over mix or your cupcakes will be tough and chewing instead of light and fluffy. 
-spoon batter 3/4 full into lined muffin tins

Bake at 350 for 15-20 minutes 
(or until an inserted toothpick comes out clean)

Chocolate Icing

-1 C milk chocolate chips
-1/2 C cream
-2 tbsp butter
-1/2 tsp vanilla
-about 2 C icing sugar

-in a microwave safe dish, melt the chocolate chips and the cream together on high at 30 sec intervals, stirring each time until you have a smooth ganache
-in a mixing bowl add butter, chocolate mixture, vanilla, and about a cup of the icing sugar. Mix until fully incorporated.
-add more icing sugar until desired icing consistency is reached.
(keep in mind that the chocolate will harden quite a bit once it cools, so your icing doesn't have to be super thick)
-pipe or spread onto your cupcakes and enjoy!


Saturday, July 25, 2015

Fresh Blackberry Pie

It's berry season, and what is better than a fresh blackberry pie in the heat of summer? It definitely makes up for all the scratches and slivers you get from picking the berries! 

Fresh Blackberry Pie

-1 baked pie shell 
-about 4 1/2 C of fresh berries
-1/2 C sugar
-2 tbsp corn starch

-place 1 C of the berries into a saucepan with the sugar
(I use the less ripe, and smaller berries for this)
-heat over medium heat, smashing the berries as you stir.
-For best results, once the mixture is hot and the juices are leaching out of the berries, strain the mixture through a mesh sieve to remove most of the seeds. I usually use a spoon and press the mixture until there are only seeds remaining in the sieve. This can take quite a bit of time, but it's well worth it!
-Whisk in the corn starch before returning to the heat.
-Simmer over medium heat until the juice becomes a thick sauce. Add more sugar if the sauce is too tart (this really depends on the sweetness of the berries)You can also add a bit of water if the sauce turns out too thick. You want a nice pudding consistency, not too runny and not too thick that you can't mix in the berries.
-Remove from heat and let cool to room temperature.
-Gently fold in the berries and spoon into the pie shell.
-Refrigerate until ready to serve. 


Out of Season Variation: 
This is perfect when you pick so many berries that you don't know what to do with. It also works great with frozen berries that you buy at the store if you aren't lucky enough to live in an area with blackberries ;) 

-1 baked pie shell
-4 C frozen berries
-3/4 C berry juice
-1/2 Sugar
-2 Tbsp corn starch

-thaw berries in a strainer over a bowl.
-use the juice that was strained and add enough water to get 3/4 C of liquid. Mix it with the sugar and cornstarch in a saucepan.
-cook over medium low heat until sauce is thick.
-Cool and gently fold in berries. 


Friday, July 24, 2015

My Nanaimo Bar Obsession

So I've been on a Nanaimo Bar kick the last little while. I've made nanaimo bars (recipe HERE), nanaimo bar cupcakes, nanaimo bar icecream, and I have plans to make Nanaimo Bar cheesecake when I'm allowed to bake again. (My husband and I have a deal that I only make treats ONCE a week, and I've already gone way past my quota this last week...)

Anyway, the problem with having a small obsession with this divine Canadian confection is that I'm running low on the most important ingredient: Bird's Custard Powder. If I lived in Canada that wouldn't be a problem, but I don't, so it is. I could make my confections using vanilla pudding instead (and I've tried this before) but it just isn't as good.

The solution to my dilemma was quite simple. Why not make custard?! I found the original custard recipe HERE, but tweaked it a bit to fit my needs. Sure, using custard powder is the easiest option, but since I don't exactly have that option, I decided to go with making custard from scratch. Because I LOVE making things from scratch, I didn't mind the extra time and effort this added to my nanaimo bar baking experience. And guess what? It turned out AMAZING! Smooth and silky, with just the right custard flavor. So if you can't get your hands on custard powder, don't use vanilla pudding, try this instead! Stay tuned for recipes featuring nanaimo bar cupcakes and icecream! (when I get another free moment to write them down!)

Nanaimo Bar Filling

-1/2 C milk
-1/2 C cream
-2 tsp vanilla
-4 egg yolks
-2 tsp corn starch
 
-1/4 C butter
-2 to 4 C icing sugar

-in a heatproof bowl whisk together the egg yolks, corn starch and vanilla
-in a saucepan, combine the milk and cream and heat over medium, stirring constantly until the milk/cream mixture is hot, almost boiling, but do not allow boil.
-temper the eggs by pouring a little of the hot milk mixture into the egg mixture while whisking constantly. After the first little bit has been whisked in, slowly add the rest of the milk mixture in a slow stream while whisking constantly.
-return the mixture to the saucepan and cook, stirring constantly over low heat until the mixture thickens and coats the back of a spoon. (If you cook the mixture too long, or allow it to boil it could curdle, and you don't want that!)
-allow to cool to room temperature
-in a mixing bowl cream together the custard, butter and icing sugar. (start with about 2 c of the icing sugar and add more if needed to make it thick enough to spread melted chocolate over. 


Tuesday, July 14, 2015

Belgian Buttermilk Waffles

These waffles are light, fluffy and flavorful. A waffle mix can't even compare with these amazing waffles! I took a simple belgian waffle recipe from an old cook book I had laying around and modified it into the best belgian waffles I've ever had! This Butter Pecan Sauce also goes well on top of these waffles.

Belgian Buttermilk Waffles

-1 1/2 C flour
-2 tsp baking powder
-1/2 tsp baking soda
-pinch of salt (about 1/8 tsp)
-3 Tbsp sugar
-1 1/2 C buttermilk
-1/2 C melted butter
-1 tsp vanilla
-3 eggs, separated

-Beat egg whites until stiff peaks form
-Meanwhile, mix all the other ingredients together until smooth. Fold in the egg whites.
-Follow the instructions on your waffle iron for cooking the waffles.


Wednesday, July 8, 2015

Chocolate Ice Cream

This ice cream is delicious, especially on an extremely hot day! I don't think I will ever buy ice cream again.

Chocolate Ice Cream

-2 C whole milk
-5 egg yolks
-3/4 C sugar
-2 tsp vanilla
-1 C powdered milk
-2 C cream
-1 C melted milk chocolate

-stirring constantly in a saucepan over medium heat, warm the milk until it is hot, but not boiling.
-in a bowl whisk the egg yolks, sugar and vanilla together.
-temper the eggs by SLOWLY pouring the hot milk into the egg mixture in a slow stream while constantly whisking the eggs. When all the milk has been added and thoroughly mixed, return the mixture to the saucepan and continue to simmer  and stir constantly for 5 to 10 minutes over low heat.
-let the mixture cool.
-in a different bowl, mix the powdered milk in with 1 1/2 cups of the cream and strain out the lumps.
-in a microwave safe container, melt and then mix the chocolate and 1/2 C cream together into a smooth ganache.
-add everything together and refrigerate for a few hours or overnight.
-Mix icecream according to your ice cream makers instructions, or
-place in a kitchen aid and beat on high for a few minutes, then place the bowl in the freezer.
-take the bowl out of the freezer every 20-30 minutes and beat on high until smooth.
-do this until a soft serve ice cream is formed.
-Mix in your favorite mix-ins and pour into a freezer safe container and freeze until hardened. Or eat immediately!


Monday, July 6, 2015

Butter Pecan Sauce

This sauce is absolutely divine! I found this recipe around 8 years ago while randomly flipping through my Mom's collection of recipes, but hadn't actually tried it until just last year. Since then, it has been a favorite for special occasions. It goes perfect on these pancakes! It can also be used as an ice cream topper.


Butter Pecan Sauce

-1/2 C Butter            -1 C Whipping Cream
-3/4 C Sugar             -1 C Chopped Pecans
-1/4 C Corn Syrup     -1/2 tsp Vanilla

-Cook butter in a saucepan, 4-6 minutes or until golden brown.
-Stir in sugar and syrup.
-Cook and stir until sugar is dissolved.
-Remove from heat and gradually stir in cream.
-Return to heat, bring to a boil, then reduce heat to medium.
-Cook until the mixture thickens.
-Remove and stir in nuts and vanilla.
-Serve warm


             Variation: use walnuts in place of pecans, and maple extract in place of vanilla for a maple-walnut sauce that is also extremely yummy! 

Tips for Ditching the Box

Sometimes making EVERYTHING from scratch can be a challenge, especially when life gets busy and realize that you probably should have eaten dinner an hour ago. Here are a few tips I've discovered really help make life easier when you don't cook from a box.

-Buy (or grow if you have a garden!) fresh vegetables, cut them up, blanch them and then freeze them. This takes a lot of initial prep time, but once it's done it's much easier to grab what you want from the freezer right when you need it. It cuts down on prep time when preparing certain meals, or when you decide you'd like a side of vegetables.

-Make extra food and instead of eating leftovers for days on end, freeze it! My kids will not eat leftovers, but when I freeze the leftovers I can pull them out on days that I don't feel like cooking or don't have time to. All the sudden, it's not a leftover anymore, it's a new meal that you haven't eaten in awhile.

-Collect recipes and make a list according to categories and put it up on your fridge.
An example could be:
      -meals that don't require turning on the oven (for hot days)
      -meals in under 20 minutes
      -meals for when I'm super motivated and want to make something spectacular and don't want to spend money going out to eat

...stuff like that...

-Making freezer meals ahead of time is also always a great idea. When I feel like treats, I like to make cookie dough, form it into individual balls and freeze it for whenever I feel like eating a fresh cookie (but to be perfectly honest, the dough rarely makes it to the oven because my husband and I usually eat the dough before that happens!)

In conclusion, making everything from scratch takes a lot of planning and preparation, but just like everything, once you get used to it, it gets easier and more enjoyable. You could try a gradual decent by starting with one meal a week and going from there. Either way, I believe that food is to be enjoyed as well as being an essential part of life. Happy cooking!

Sweet n Sour Meatballs

This dish is packed with flavor! It has a bed of rice, seasoned vegetables piled on and is topped with sweet n sour meatballs and sauce. I love this sweet and sour sauce because it is super easy to make and can be made from ingredients that I always have on hand. I put a slight spin on my Mom's original meatball recipe to really amp up the flavor. I used mostly frozen vegetables that I buy fresh, and then blanch (excluding the corn and peas). This time when I made this I actually wrote down what I did, so I could share the recipe!

Sweet n Sour Meatballs

Meatballs                                                     
   -1 lb ground beef                              
   -1/3 to1/2 C oats                                         
   -1/2 minced onion                            
   -1 tsp minced garlic                          
   -1/4 tsp pepper                                    
   -1/2 tsp salt                                      
   -1/8 to 1/4 tsp ground ginger                        
   -1/4 to1/2 tsp ground cumin                      
   -1 tsp sesame seed oil                      
   -2-3 Tbsp soy sauce 

   -1 egg 

Seasoned Vegetables  
   -1 C corn                   
   -1 C peas
   -1 C chopped broccoli
   -1 C chopped carrots
   -1 bell pepper, diced
   -1/2 onion, diced
   -any other vegetables you'd like
   -salt and pepper to taste
   -1/8 tsp ground cumin
   -1/8 tsp ground ginger
   -2 Tbsp soy sauce
   -1 tsp sesame seed oil

Sweet n Sour Sauce                           
   -1 C brown sugar
   -1/4 C ketchup
   -1/3 C vinegar
   -2 Tbsp soy sauce

Meatballs
Dump all the ingredients into a bowl and mix thoroughly. Form into balls and place in a frying pan over medium to medium-low heat. Place a lid on top for more thorough cooking. Turn each ball every few minutes until all side are browned and the internal temperature of the meatball reads at least 160 degrees F.

Vegetables
Mix the seasonings (ginger, cumin, soy sauce, sesame seed oil and salt and pepper) in a small bowl and drizzle over the vegetables, stirring until all the vegetables are coated. Cook the vegetables in a large frying pan with a little bit of oil or butter over medium heat until desired tenderness is reached. 

Sweet and Sour Sauce
Place all the ingredients into a sauce pan. Bring to a boil over medium-high heat and then reduce the heat to medium-low and continue to simmer for about 5 minutes.

When sauce is finished, mix in the meatballs, coating them completely with the sauce.

*For a thicker sauce*: Mix 2 Tbsp of cornstarch with 1 C of cold water. Whisk into the sauce and cook over medium heat until the sauce darkens in color and thickens. (roughly 5-10 minutes)

Plate cooked rice, then vegetables, and finally top with the meatballs and sauce. Enjoy! 


Monday, June 29, 2015

Creamy Garlic Chicken

You know when it is 5 o'clock and you have no clue what you are going to make for dinner? So you open your fridge and decide you can throw together something eatable out of the random things in there. That is pretty much what I did here, but it turned out so good that I figured I'd better record what I did so I could make it again sometime in the future, because my kids couldn't get enough of it!

Creamy Garlic Chicken


Chicken mixture:                           
  -2 cloves of garlic, minced            
  -1 medium onion, diced                
  -1 bell pepper, diced                            
  -1 large tomato, diced                  
  -1 chicken breast, diced              
  -1 tsp Italian seasoning
  -2 tbsp olive oil


Garlic Sauce:
   -1/2 c butter
   -2 cloves of garlic, minced
   -1 tbsp flour
   -1 c milk
   -salt and pepper, to taste

-Pasta of choice

-Saute chicken with the olive oil and seasoning. Add the vegetables and cook until they reach desired tenderness.

-In a sauce pan, melt the butter with the garlic. Whisk in the flour and cook for a few minutes, until thick. Whisk in the milk until smooth and cook over medium heat until the flour is fully cooked. Add salt and pepper to taste and pour over the chicken mixture, and continue to simmer over medium low heat for 5-10 minutes while your pasta cooks.

-Bring water to a boil and add pasta. Cook until pasta is tender. Drain.

Plate pasta and spoon on desired amount of chicken garlic sauce. Enjoy!


Wednesday, June 10, 2015

Quick and Easy Tomato Soup

Yesterday was hot and I didn't especially feel like cooking because my husband is out of town. That and cooking just for kids can be a real pain, especially picky eaters. So about half an hour after our regular dinner time, I finally decided to throw together some grilled cheese sandwiches. I like to eat my grilled cheese with tomato soup, but since I don't have any canned soup I had to make my own. The following recipe is what I came up with. Nothing fancy, but it's easy, fast and my kids actually ate it...well first they complained about how yucky it was...until they tasted it, then it didn't take too long to disappear.
You can definitely enhance the soup by using fresh chopped, garlic, and basil, but for a decent meal in under 10 minutes, the dried spices worked just fine.

Simple Cream of Tomato Soup

-1 can of diced Tomatoes
-1/4 C cream or milk
-1 tsp garlic powder (or minced garlic)
-2 tsp onion powder (or diced onions)
-basil to taste
-salt and pepper to taste
-1 bay leaf (to be removed before serving)

-Mix everything together and bring to a boil. Simmer on low heat until you are ready to serve.
-If you don't like chunky tomato soup, you can blend your ingredients before heating, or use tomato sauce instead of the diced tomatoes.


Friday, May 8, 2015

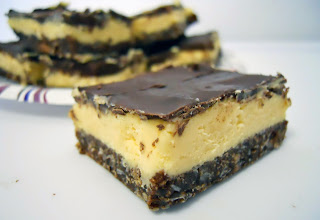
Nanaimo Bars

This is a classic Nanaimo Bar recipe. Best Canadian treat ever. I'm including some instructions on how to make them without Bird's Custard Powder, since I've never been able to find it in the states. They aren't as good, but they still taste yummy, especially if you are really craving a nanaimo bar.

Nanaimo Bars

Bottom Layer:                           
   -1/2 C Butter                                
   -1/2 C Sugar                                
   -1/3 C Cocoa                                
   -1 Egg, slightly beaten                  
   -2 C Graham Cracker Crumbs
   -1 C Coconut


 Middle Layer:

   -1/2 C Butter
   - 1/4 C Cream
   -2 Tbsp Custard Powder
   -2 to 4 C Icing Sugar

Top Layer:
    -1 1/2 or 2 C Chocolate Chips

Bottom Layer:
-in a saucepan over medium heat, melt the butter with the sugar and cocoa until the sugar is dissolved.
-add the egg and cook until the mixture has thickened slightly
-mix in the graham crackers and coconut and press into a 9 x 13 pan. let cool.

Middle Layer:
-Mix the cream with the custard powder until smooth. Whip it in with the butter and icing sugar. Add more cream if it's too dry or more icing sugar if the mixture is too soft.
-You'll want the end result to be fairly thick in consistency. Thick enough to be able to spread melted chocolate over.

Top Layer:
-melt the chocolate chips and spread on top. Chill and then cut into squares.

Making Nanaimo Bars without custard powder:
Substitute the custard powder with 2 Tbsp of instant vanilla pudding + 1 tsp vanilla extract. Mix the pudding with the cream until the sugar has dissolved completely
(or else your middle layer will be gritty instead of smooth.)


Taco Soup

I didn't really know what Taco Soup was, since I'd only had it maybe 2 times ever in my life. One day I decided to give it a try and make some and this is what I came up with.

Taco Soup

-1 lb ground beef             
-1 onion, diced
-1 pkg taco seasoning      

-2 cloves garlic, minced              
-2 C beef broth
-1 can tomato sauce        
-1 can diced tomatoes
-1 green pepper, diced
-1 red pepper, diced
-2 C frozen corn
-1 can pinto beans           

-1 can kidney beans
-chili powder, to taste
-cumin, to taste
-cilantro, to taste (fresh or dried)
-salt & pepper, to taste    

-Brown the beef. Add the taco seasoning.
-combing everything else into a soup pot
-Add the spices to your personal taste.
(usually 1/8- 1/4 tsp)
-Simmer over medium-low heat until the vegetables are tender.
-Serve with tortilla chips, cheese and sour cream


Puffed Wheat Squares

I got this recipe from my mom and I loved it when she made these when I was a kid.

Puffed Wheat Squares

   -1/3 C Butter           
   -1/2 C Corn Syrup (dark corn syrup works best)
   -1 C Brown Sugar   
   -2 Tbsp Cocoa 
   -1 tsp Vanilla          
   -8 C Puffed Wheat Cereal (plain, not Smacks or Sugar Crisp)

-Mix everything together except cereal in a sauce pan over medium heat and bring to a boil for 2 1/2  to 3 minutes.
-remove from heat and pour over cereal
-press into a greased 9 x 13 pan and let cool.


Triple Chocolate Chip Cookies

This is one of my favorite creations. My family seriously cannot get enough of these cookies, they are SO good! Slightly crisp on the outside, soft and gooey on the inside!

Triple Chocolate Chip Cookies

-1 C Butter                
-1 C White Sugar      
-1 C Brown Sugar    
-1 tsp Salt                
-2 tsp Vanilla            
-2 Eggs   

-1 tsp Baking Powder
-1 tsp Baking Soda
-1 1/2 C Flour
-1 3/4 C Cocoa
-1 C semi sweet chocolate chips
-1 C white chocolate chips


-Cream butter, sugars, salt and vanilla.
-Add eggs one at a time, mixing each time until combined.
-mix in baking powder, baking soda, cocoa and flour
-stir in chocolate chips.
-chill dough for 1/2 hr in the fridge and then form into balls.
-place on a cookie sheet layered with parchment paper


Bake at 350 degrees for 10-12 minutes